Open Plan Kitchen Refurbishment on a budget
25 September 2018
A step by step case study on how we refurbished an entire kitchen, and created an open plan living room on a shoestring budget. Follow this case study of the DIY kitchen refurbishment in my own house to see how we made the most of our space and budget.
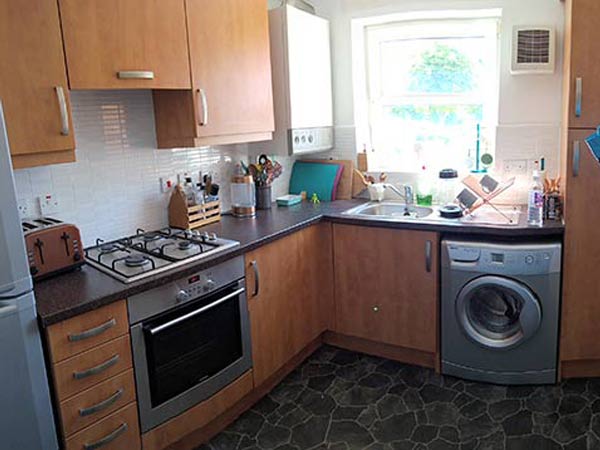
We knew we wanted to create an open plan layout for the ground floor of the house, and also wanted to replace our existing kitchen which was tired and not very attractive.
The issue for us was budget: we couldn't afford to hire the professionals so decided to take on most of the work ourselves. There were a few very specific jobs to which only trusted the professionals, however for the most part we researched and did the work ourselves! The entire project took around 2 weeks to complete (though many of the small finishing works weren't done until months later) but the whole project cost us less than £2000 to replace the entire kitchen, and demolish the partition to create an open plan layout including plumbing, electrics, tiling, plastering and fitting.
We couldn't have done it without help & advice from friends and family including my Brother, Dad, Step-Dad and neighbours who even brought us home cooked meals when we were sick of pot noodles, so a massive thanks to everyone for the help and support!
For our new kitchen units we selected a cheap range of modern looking units from Wickes which would complement our existing living room theme. We also planned to repaint the kitchen to match the lounge, but retain the existing tiles and kitchen layout, adding a few extra units.
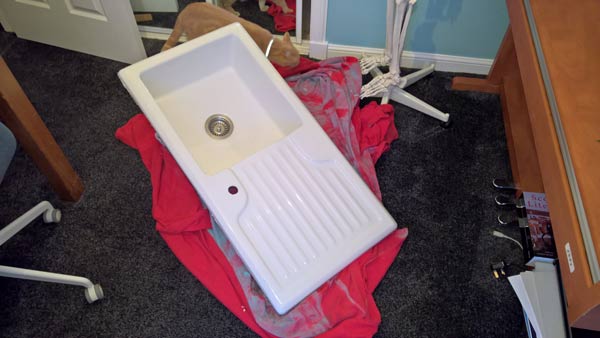
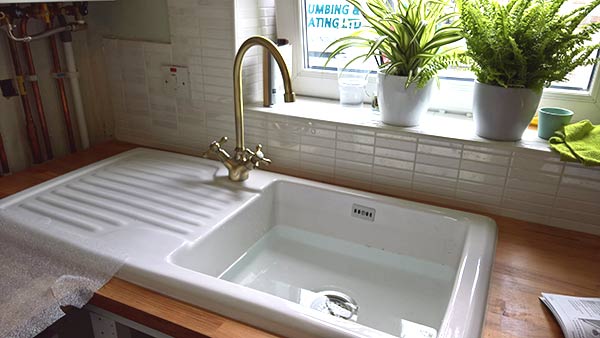
We had planned to do the kitchen for months in advance so had the luxury of time to comb Gumtree, Facebook and Ebay for bargain finds such as a ceramic sink for £30, a 1.8m length of real marble worktop for £5, massively discounted kitchen units, a new hob for £15, not to mention many skip dives, all of which we squirreled away and stored all over the house for later use.
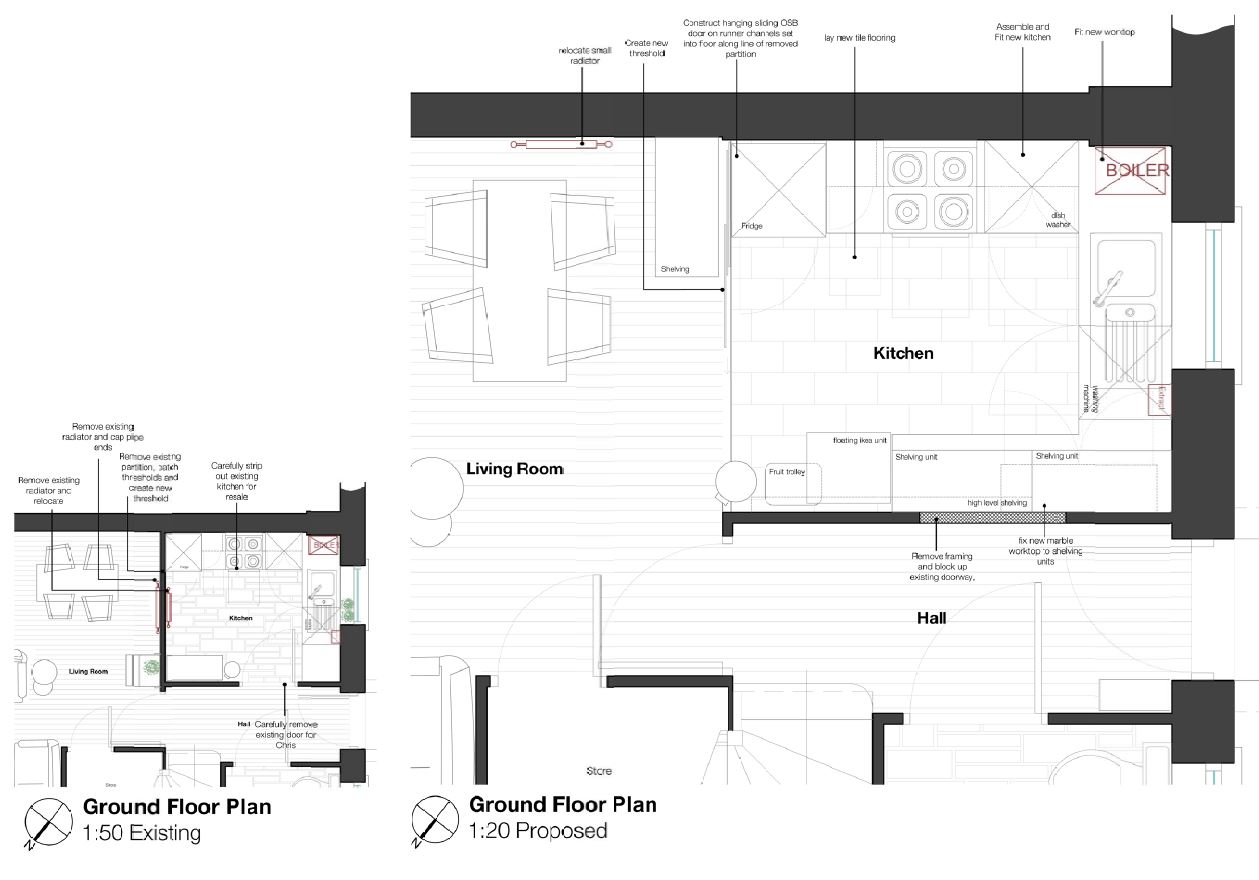
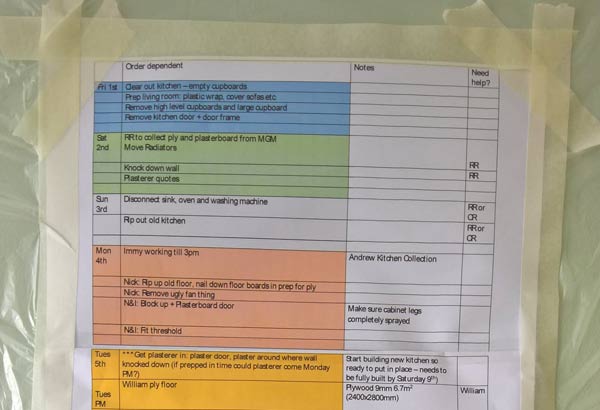
It all starts with the programme. This elaborate time plan took some time to create, but allowed us to coordinate our efforts and move from job to job seamlessly without wasting downtime having to plan things on the fly later.
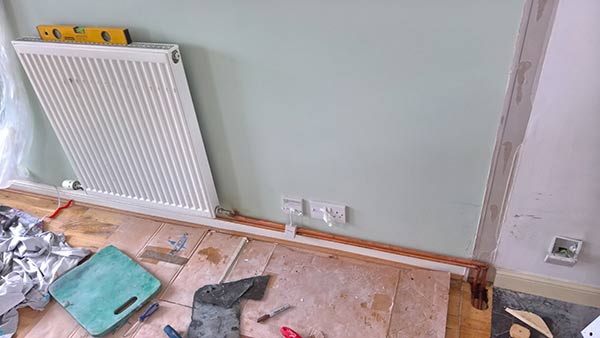
Before we could take down the partition wall we had to remove the existing radiators. We lifted floorboards, removed one radiator and capped it below the floor. For the other radiator we had to solder the new plumbing and reroute it along the wall to the new radiator location. This job was beyond us technically, and you're never too old to ask for help from your old man, so thanks Dad!
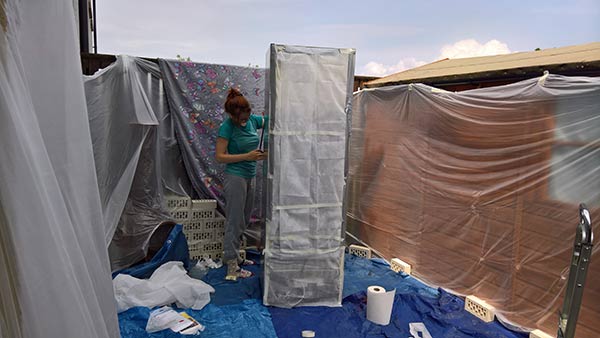
We prepped for the messy demolition work by wrapping the living room in plastic: we would be living under dusty conditions for the next few weeks and so wanted to protect the floors, sofas, tv etc.

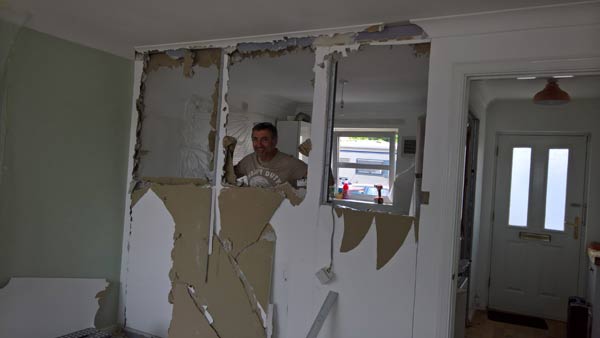
With the room protected the first job was to remove the partition wall to create the open plan kitchen/living area, and give us more room to work. We had already lifted floorboards to check which way the floor joists ran to ensure the partition wasn't structural! We started by cutting down the sides of the plasterboard and removed in sheets to avoid excess dust and mess. We then used a grinder to take down the metal studwork. We set good pieces aside for use in blocking up the kitchen doorway.
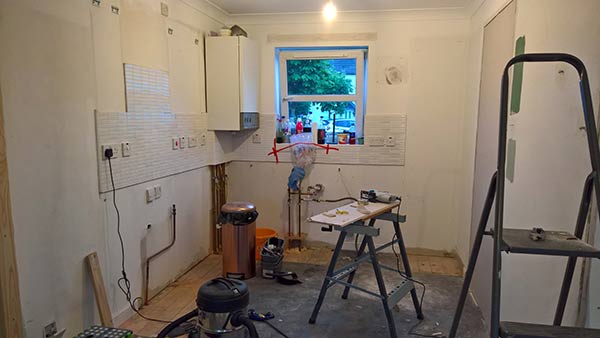
With the room now open, we carefully stripped out and removed the entire existing kitchen, as we intended to sell the old kitchen on Gumtree: a great way to recoup some of our costs. We took photos as we removed each unit and labelled for reassembly later. The removal of the kitchen was also organized for collection by the new seller for the next day to avoid having to store lots of the old units in the work area.
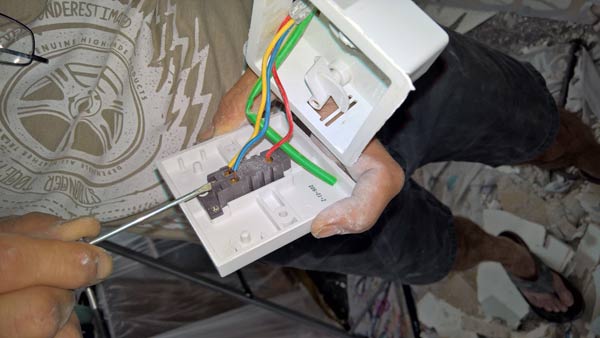
Before blocking up the door opening we had to relocate light switches to the now open plan living room. If in doubt always hire a skilled professional but in this case we were just relocating an existing switch so decided to do it ourselves. Needless to say it was more complicated than we thought and required some creative thinking when it came to feeding the cable through its new routing around the existing studs.
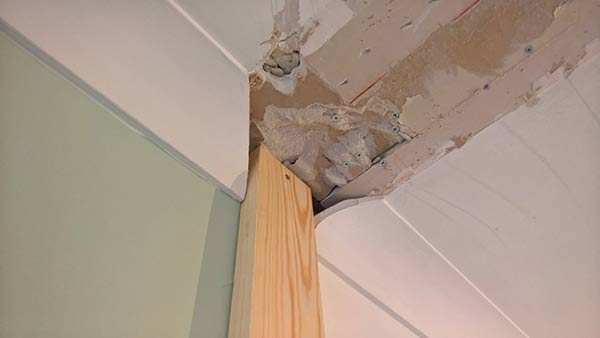
For the old doorway We cut the old studs from the partition wall to size using a grinder, and reused them to block up the existing doorway by first stripping out the old door and frame, then fixing the studs and covering with plasterboard.
After installing the plasterboard, we hired a plasterer to skim both sides of the new doorway, and also along the line of where the old partition was removed. This was one of the few jobs we paid someone to do for us and unfortunately we hired a budget plasterer from Gumtree and got what we paid for: A half-finished job and a lot of mess which we had to redo ourselves. The lesson is when paying professionals, make sure you actually get a professional! We also had to carefully plaster a detail around the threshold and architraves for the new sliding door.
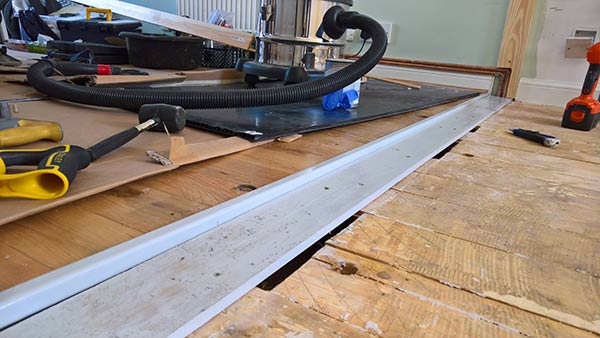
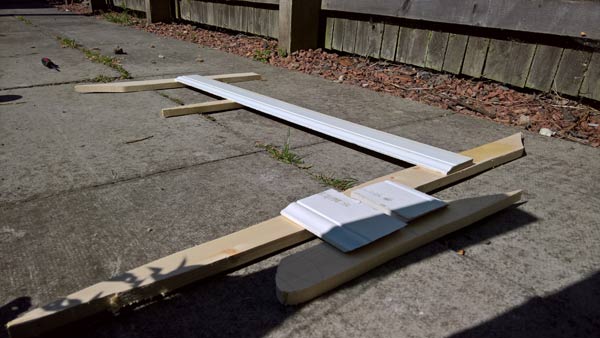
With the new threshold fitted, we installed a floor track for our new homemade timber sliding doors which would be fitted later. The track was made from strips of gloss painted pine. A lot of time went into planning the depth of the track to work as a threshold strip between the tiles and the timber flooring, whilst also working as a track for the sliding doors. The sliding doors were a whole project in itself, you can read all about it here.
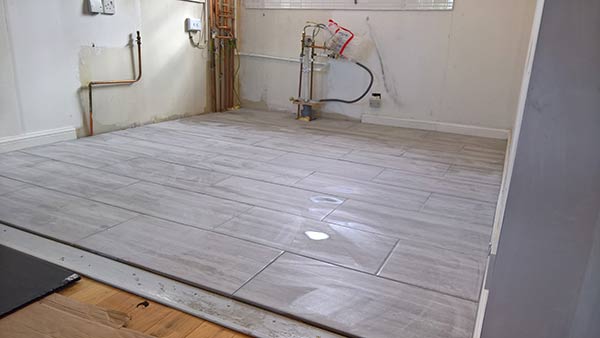
At this point we had 48 hours while the plaster dried where we couldn't paint or install new units. We therefore allotted this time for tiling, which would also need time to settle before we installed the new units.
We pulled up the existing lino, scraped back any glue or staples and roughly sanded the floor. We also fixed any loose floorboards down and covered in 18mm plywood in preparation for tiling. We also paid a professional to do our tiling. We were put in touch with a tiler through our neighbour, so thanks for the contact Graham! The tiles we chose were discontinued and heavily discounted at Wickes (of course) so we bought them months before, going for a smooth stone finish to contrast with the new gloss kitchen units.
We used the 48 hours while the plaster and tiling settled to pre assemble the kitchen units and save time later. Once dried we painted the kitchen walls green to match the living room, and also repainted the ceiling and other walls white. Again we used the time between coats to complete other non time-dependant jobs which we had planned for in advance.
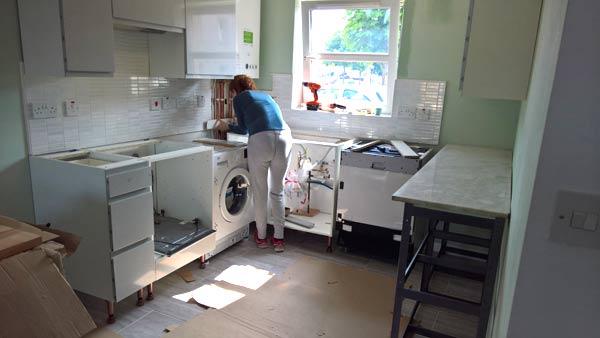
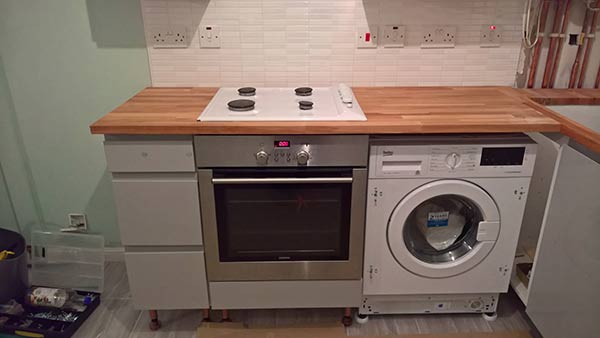
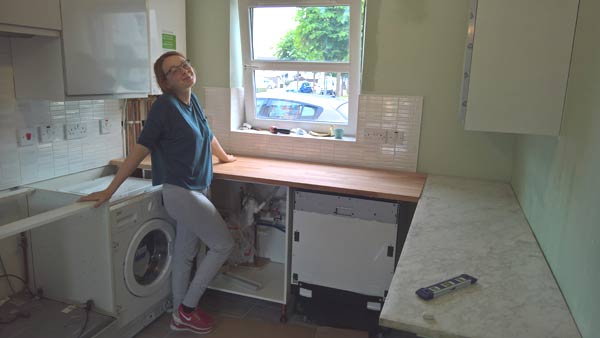
We then began installing the new unit carcasses, fixing to each other then back to the wall, making sure the levels were flat across each axis at every point. We also moved the oven, dishwasher and washing machine into place for connection later.
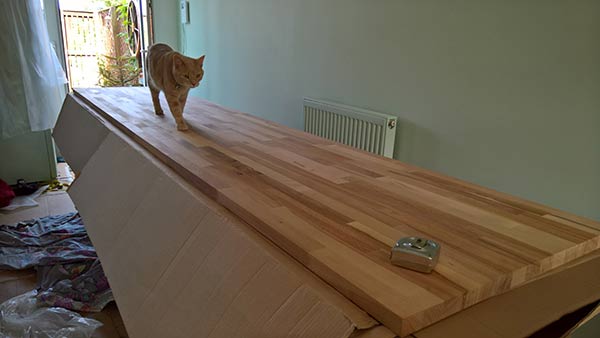
With the units fitted we measured and cut the worktop. We first marked the worktop using a cardboard template for the hob and sink. Then we checked and rechecked, and checked once more before checking one last time cutting with a jigsaw. This stage of the project was nervewracking, but hey presto, the hob and sink fit into the holes perfectly!
The worktop was secured and fixed to the units, and back to the wall, again checking the levels regularly as we went. Our 28mm worktop was too shallow to fit together with a classic mitre joint, and so we fixed it together with adjustable brackets fixed to the bottom of the worktop, which then pulled the two legs of worktop together for a tight joint, and sealed with silicone to be sure of waterproofing. My brother Chris was on hand at this point for extra muscle and his technical expertise was invaluable!
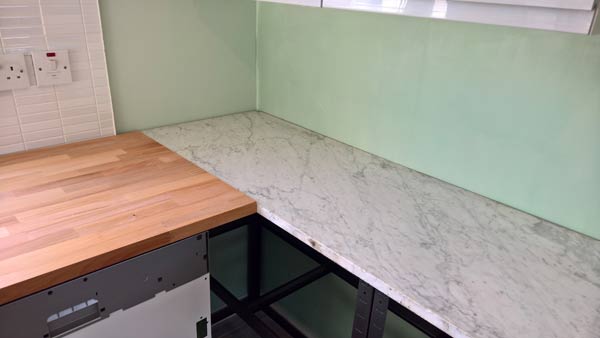
We used the free section of marble worktop which we had stored previously to create a new length of worktop. The marble was cleaned, stripped of old silicone sealant and we assembled grey metal shelving units to create a new length of units down the wall where door used to be. We Padded the units with MDF to level and manoeuvred the marble into place to form a U shape kitchen. This created a lovely contrasting joint at the corner between the timber and marble worktops.
As with any DIY job, the best way to make God laugh is to make a plan! The opposite corner of the kitchen required a considerable amount of bodging to make a corner unit work around the new sink, the boiler pipes and the washing machine. In the end I butchered an existing carcass and rebuilt it almost from scratch with custom structural posts concealed behind the washing machine in order to support the worktop, and still allow us an openable door in the corner.
Our nice new ceramic sink also caused unforeseen problems, as the deeper bowl meant we needed to completely redo the plumbing. Plumbing isn't our strong point, but between Google and some help from Chris we managed to get it sorted.
There were lots of similar small jobs we didn't initially account for such as cutting and fitting of new skirtings, tile edge trims, tidying edges etc. But luckily our programme had allowed ample time for unforeseen complications and we budgeted twice as much time as we thought we needed for each job just for this reason.
Finally though the units and worktop were fitted and we could connect the cooker, washing machine and dishwasher, to give us a working, though still unfished, kitchen!
The first of the finishing touches was repainting the existing silver fridge green to match the walls. We initially tried appliance paint which was a disaster, then spray-paint which came in patchy and finally standard matt paint which worked the charm (after 6 coats) needless to say this was a job which took much longer than expected).
I used what was left of the worktop to create a boxout to conceal the boiler pipes, which could be removed for annual servicing.
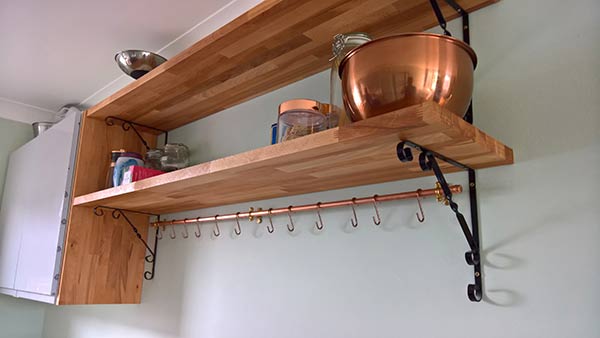
We also created a number of high level shelves, and end plinths to cover the standard white coated chipboard to the ends of the high level units.
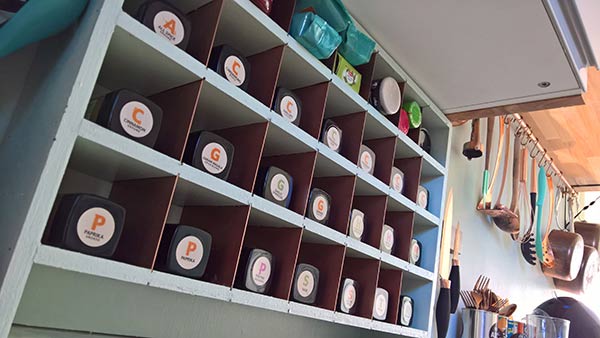
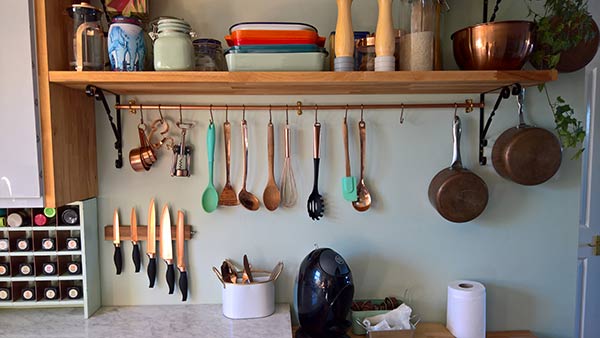
Another little extra was an old license plate letter holder found in Alfs garage, which turned into a nice spice rack when we painted it green to match the walls, and spray-painted the separators copper. Thanks for the freebie Alf!
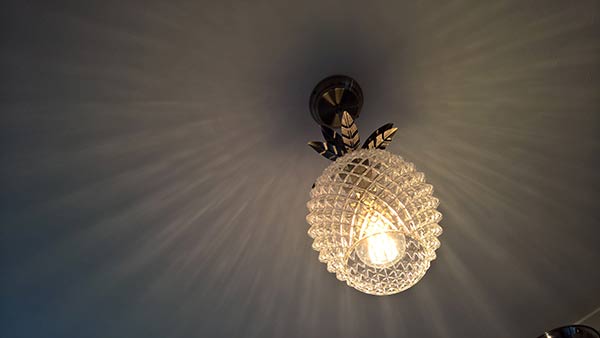
Never underestimate the impact the right lighting can have on a space. We chose the light fitting specifically for its soft glow and dramatic shapes cast from the glass shade.
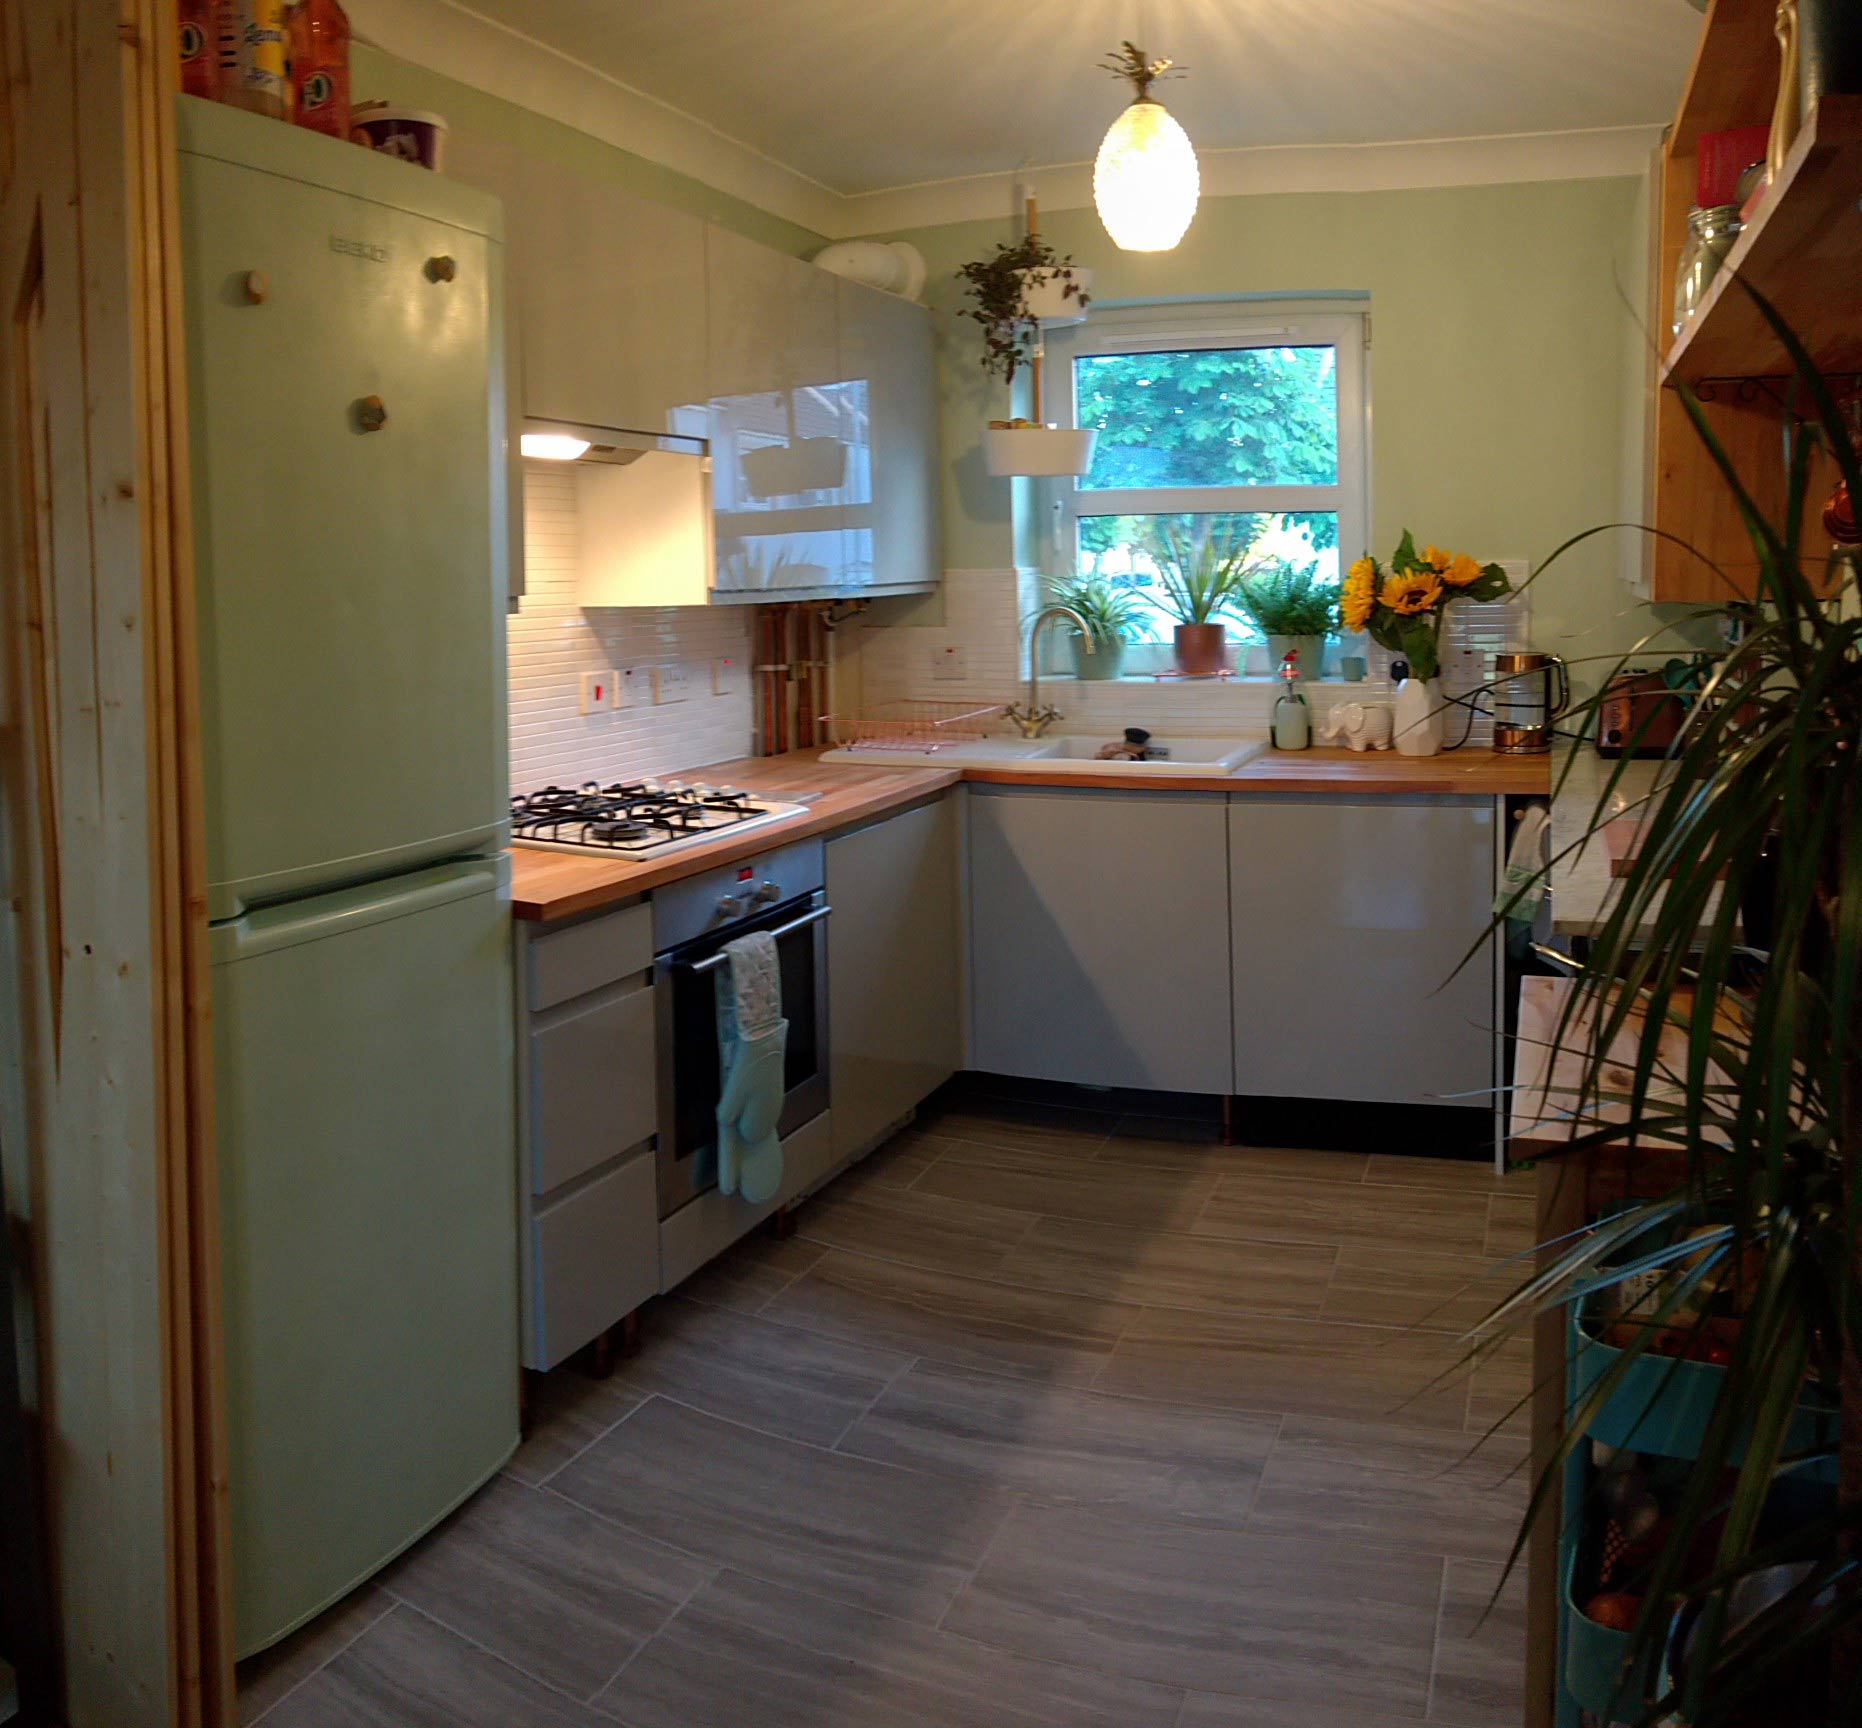
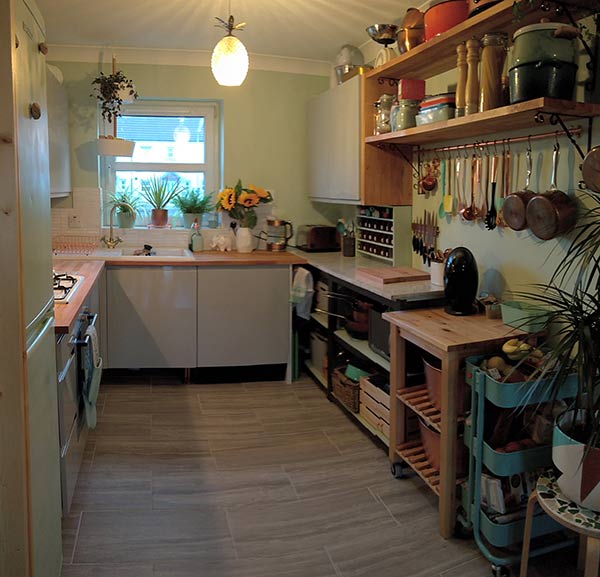
We maintained a strong vision throughout by sticking to a limited colour and materials palette: grey for the units and floor, timber for shelving and worktops, green and copper as our accent colours.
We made the most of our limited space by filling the kitchen with lots of useful little extras such as hanging utensil rails from some spare copper pipe left over from the radiators; a sliding towel rail in the dead space behind the dishwasher; the custom spicerack and shelving.
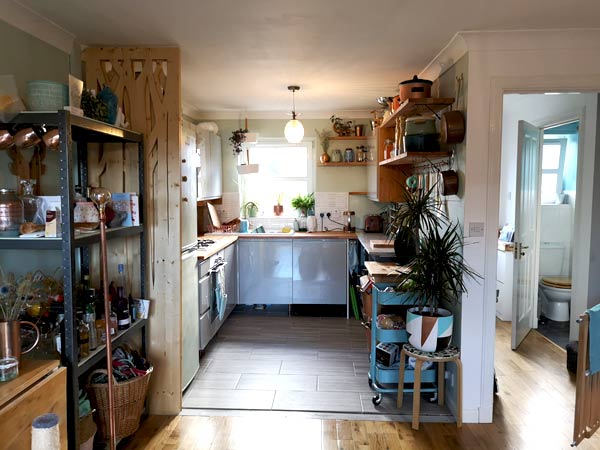
By removing the wall between the kitchen and living room we made both spaces much more useable, creating a better flow through the house in terms of movement, light and space.
Before and After Refurbishment
hover or tap & hold images for comparison

Are you looking to refurbish or revamp your home? Get in touch with Richard Robb Architects and we can help guide you through your project!
Contact UsTo follow this series you can subscribe to our newsletter "the Ground Floor" using the link below.
Join the Ground Floor Newsletter